Understanding the wiring diagram of a starter solenoid is crucial for anyone working with automotive electrical systems. Whether you’re a professional mechanic or a DIY enthusiast, knowing how the starter solenoid functions and how to wire it properly can prevent costly mistakes and ensure your engine starts reliably. The starter solenoid acts as the bridge between the ignition switch and the starter motor, controlling a high current circuit with a low current signal. It plays a critical role in engine starting systems, and grasping its wiring diagram will help with diagnostics, repairs, and custom installations.
What Is a Starter Solenoid?
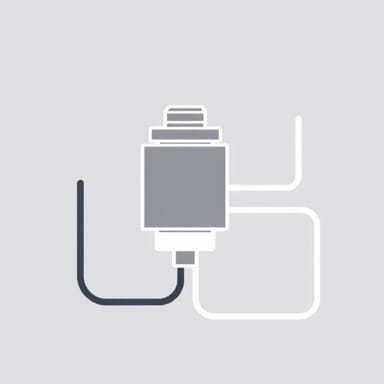
A starter solenoid is an electromechanical switch that engages the starter motor when the ignition key is turned. It is often mounted directly on the starter motor, though in some systems, it may be mounted separately. The solenoid receives a low-voltage signal from the ignition switch and uses it to close a high-voltage circuit that delivers battery power to the starter motor, cranking the engine.
Core Functions of the Starter Solenoid
- Receives electrical current from the ignition switch
- Acts as a relay to deliver high current to the starter motor
- Pushes the starter gear to engage the flywheel (in most systems)
Basic Components in a Starter Solenoid Wiring Diagram
Before diving into the diagram itself, it’s important to identify the components involved:
- Battery: The power source for the entire starting system
- Ignition Switch: Sends a low current signal to the solenoid when turned to the Start position
- Starter Solenoid: Acts as a switch to power the starter motor
- Starter Motor: Cranks the engine to initiate combustion
- Ground Connection: Completes the circuit and allows current flow
Understanding the Starter Solenoid Wiring Diagram
The typical starter solenoid wiring diagram includes several connections that are essential to making the system function correctly. Most starter solenoids have three or four terminals. Here’s what you will see in a common layout:
Terminal Layout
- S Terminal: Connected to the ignition switch. This terminal receives the low-voltage signal.
- B Terminal: Connected to the battery. This is the main power input.
- M Terminal: Connected to the starter motor. This sends power to the motor when the solenoid is activated.
- Ground Terminal: Some solenoids may have a separate ground connection, while others ground through the housing.
Step-by-Step Wiring Guide
Step 1: Disconnect the Battery
Before beginning any work, always disconnect the negative battery terminal to prevent accidental short circuits or injury.
Step 2: Connect the Battery Cable
Attach the thick positive cable from the battery to the B terminal on the starter solenoid. This supplies the high current needed to start the engine.
Step 3: Connect the Starter Motor
Run a heavy-gauge wire from the M terminal to the starter motor. This connection delivers power from the solenoid to the starter once the solenoid is engaged.
Step 4: Connect the Ignition Switch
Use a smaller wire to connect the ignition switch output (usually marked as Start on the switch) to the S terminal of the solenoid. This wire carries the signal that tells the solenoid to engage.
Step 5: Ground Connection
Ensure the solenoid has a proper ground. Some solenoids are grounded through their metal mounting brackets; others require a dedicated ground wire connected to the vehicle chassis.
Common Mistakes in Starter Solenoid Wiring
Even a small mistake in wiring the starter solenoid can prevent your engine from starting. Here are some of the most common errors:
- Reversing the battery and starter terminals
- Loose or corroded connections
- Forgetting the ground wire (if required)
- Using undersized wire that can’t handle the current
Testing the Starter Solenoid
If your engine isn’t starting and you suspect a wiring or solenoid issue, here’s how to test the starter solenoid:
Visual Inspection
Check all wires for corrosion, damage, or loose connections. Ensure terminals are clean and tight.
Voltage Test
Use a multimeter to check for voltage at the B terminal (should read battery voltage). When the key is turned to Start, the S terminal should also read 12V.
Continuity Test
Test for continuity between the B and M terminals when the ignition switch is turned to Start. No continuity indicates a faulty solenoid.
Wiring Tips for Longevity and Safety
Good wiring practices ensure your starter system works reliably for years. Here are some tips:
- Use wires of the correct gauge (usually 4 to 6 gauge for battery and starter connections)
- Use heat-shrink tubing or insulated terminals to protect connections
- Keep wiring away from hot engine components to prevent melting
- Label wires if you are custom-wiring a vehicle or creating a new harness
Starter Solenoid in Different Vehicles
While the general principles are the same, starter solenoid wiring may vary slightly between cars, trucks, motorcycles, and tractors. Always consult the specific vehicle’s service manual for accurate diagrams and specifications. For example:
- Older Vehicles: Often have separate starter relays and solenoids
- Modern Vehicles: May integrate the solenoid into the starter motor assembly
- Diesel Engines: May have additional wiring for glow plugs or pre-heating systems
Why Understanding a Starter Solenoid Wiring Diagram Matters
Whether you’re troubleshooting a no-start issue, installing a new starter, or rewiring an entire engine bay, knowing how to read and interpret a starter solenoid wiring diagram gives you the confidence and knowledge to work safely and efficiently. It’s a foundational skill in automotive electrical work and can help you avoid unnecessary expenses on parts and labor.
A well-wired starter solenoid is essential for reliable engine performance. By understanding the wiring diagram and the role of each terminal, you can handle repairs, maintenance, or custom installations with ease. Follow safety precautions, use quality wiring materials, and always double-check your connections. This practical knowledge empowers you to tackle automotive electrical projects confidently and effectively.