Installing a QuickCar switch panel is one of the best decisions a racer or motorsports enthusiast can make to simplify their vehicle’s electrical system. Whether you’re building a new race car or upgrading your current setup, knowing how to wire your QuickCar switch panel properly is essential. This ensures your electrical components are functioning safely and efficiently. A switch panel serves as the control center for ignition, fuel pumps, fans, and other essential systems, and understanding the wiring diagram for a QuickCar panel is crucial to avoid issues on race day.
Understanding QuickCar Switch Panel Basics
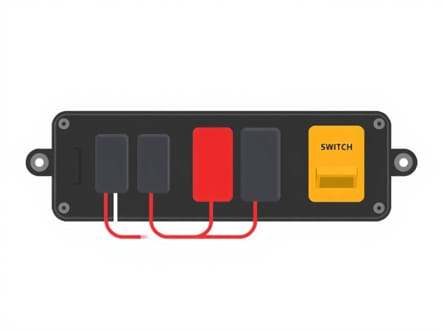
QuickCar switch panels are designed for racing and performance applications. They provide a centralized location for toggling multiple electrical systems. Depending on the model, a panel may include toggle switches, momentary buttons, indicator lights, and even push-button start features. These panels are typically mounted on the dashboard or center console of a race car.
Common Features of QuickCar Panels
- Master power switch (on/off)
- Ignition switch
- Starter button
- Accessory switches (e.g., for fuel pump, fan, or lights)
- Built-in circuit protection like fuses or circuit breakers
- Labeling for easy identification
Why a Wiring Diagram is Important
A wiring diagram is a visual representation of how each wire in your QuickCar switch panel should be connected. This helps eliminate guesswork and reduces the chance of shorts, fires, or system failures. Every circuit must be connected to the right terminal and grounded properly. A well-laid-out diagram will also make troubleshooting and future upgrades easier.
Preparing for the Installation
Before you begin wiring your QuickCar switch panel, there are a few steps to take. This preparation phase will save time and reduce the likelihood of mistakes.
Tools and Materials Needed
- QuickCar switch panel with installation instructions
- Wiring harness or automotive-grade wire
- Wire strippers and crimpers
- Ring terminals and spade connectors
- Electrical tape or heat shrink tubing
- Multimeter for testing
- Fuse panel or inline fuses (if not built into the switch panel)
Plan the Layout
Determine where your switch panel will be installed and which components each switch will control. Mark each wire according to its function (e.g., Ignition, Fuel Pump, Fan). This will make the wiring process smoother and more organized.
Step-by-Step QuickCar Switch Panel Wiring Diagram
The following is a general guide and wiring diagram breakdown for a basic QuickCar switch panel that includes a master switch, ignition toggle, starter button, and accessory toggle switches. Always refer to the panel’s specific manual for exact wire colors and configurations.
1. Master Power Switch
This switch controls power to the entire system.
- Wire from battery positive terminal to one side of the master switch (use a heavy-gauge wire and fuse).
- Other side of the master switch goes to the power distribution bus or fuse block.
2. Ignition Switch
Turns the ignition system on or off.
- One terminal connects to the switched power source (from master switch).
- Other terminal goes to the ignition coil or ignition control module.
3. Starter Button
A momentary push-button that engages the starter.
- One terminal connects to the switched power source (only hot when ignition is on).
- Other terminal goes to the starter solenoid S terminal.
4. Fuel Pump Switch
Controls the electric fuel pump.
- Power comes from the master switch or fuse block.
- Output wire goes to the positive terminal on the fuel pump.
- Make sure the circuit is fused correctly to prevent overload.
5. Cooling Fan Switch
Allows manual control of the radiator fan.
- Input wire from fused power source.
- Output wire goes to the positive lead on the electric fan.
Wiring Diagram Overview
Here’s a simplified wiring flow for a 5-switch QuickCar panel:
Battery (+) | |--->Master Switch | |--->Ignition Switch --->Ignition Coil | |--->Starter Button --->Starter Solenoid | |--->Fuel Pump Switch --->Fuel Pump | |--->Fan Switch --->Cooling Fan
Tips for a Clean and Safe Installation
Use Proper Wire Gauges
Each circuit has its own current demand. Use heavier gauge wire for circuits like the starter and fuel pump, which draw more amperage. Generally, 10-12 gauge wire is used for high-current components, and 14-16 gauge is used for low-current accessories.
Secure All Grounds
Grounding is crucial. Connect all component grounds to a clean chassis ground point or grounding bus. A poor ground will cause erratic behavior or system failure.
Label Your Wires
Use wire labels or color-coding to identify wires. This helps during installation and when troubleshooting electrical issues later.
Test Each Circuit
After wiring, use a multimeter to verify that each circuit gets power when switched on. Also, check continuity and confirm proper grounding.
Maintenance and Troubleshooting
Even with a proper installation, electrical systems can develop issues. Common problems include loose connections, blown fuses, and corroded terminals. Keeping a copy of your QuickCar switch panel wiring diagram is essential for diagnosing issues quickly.
Signs of Wiring Issues
- Flickering lights or switches not responding
- Starter doesn’t engage when the button is pressed
- Fuel pump not activating
- Fan not turning on despite the switch being on
Quick Fixes
- Check all fuses for continuity
- Tighten loose terminals and replace corroded connectors
- Use dielectric grease on terminals to prevent moisture issues
Installing and wiring a QuickCar switch panel isn’t just about flipping switches it’s about ensuring control, safety, and reliability in your vehicle’s electrical system. A clear and accurate wiring diagram, proper tools, and attention to detail are the keys to a successful installation. Whether you’re on the track or preparing in the garage, understanding how your QuickCar switch panel wiring works will give you peace of mind and a competitive edge.