Knitting in the round with stockinette stitch is a foundational technique that every knitter should learn. It creates a smooth, seamless fabric that is perfect for hats, cowls, sweaters, and more. Unlike flat knitting, where you alternate knit and purl rows to produce stockinette, knitting in the round allows you to achieve the same texture simply by knitting every round. This efficient method not only saves time but also gives your projects a clean, professional finish with fewer seams. Whether you are new to circular knitting or looking to master the nuances of this stitch, understanding how to knit stockinette in the round opens the door to countless creative possibilities.
What Is Stockinette Stitch?
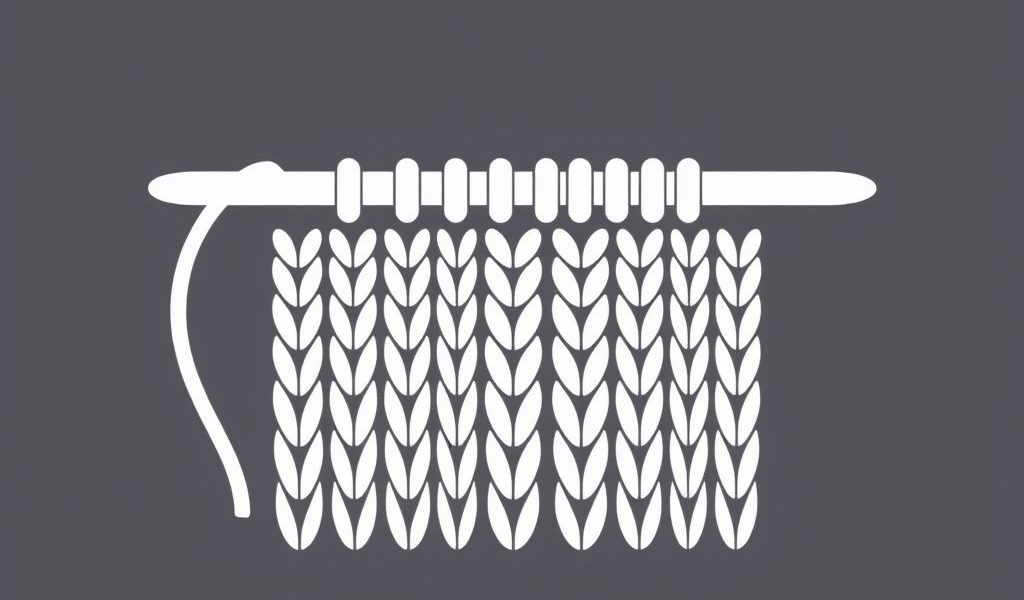
Stockinette stitch, also known as stocking stitch, is one of the most commonly used patterns in knitting. It is recognizable by its smooth, V-shaped knit stitches on the front and bumpy purl stitches on the back. The fabric tends to curl at the edges, which is a characteristic feature of stockinette.
When worked flat, stockinette is made by alternating one row of knit stitches with one row of purl stitches. However, when knitting in the round, the process becomes much simpler.
How Stockinette Stitch Works in the Round
In circular knitting, you are always working on the right side of the fabric. This means that to achieve stockinette stitch in the round, you only need to knit every round. There is no need to purl, which many knitters find to be a welcome break. This makes the technique especially useful for large projects where you want a smooth texture without constantly switching stitch types.
Benefits of Knitting Stockinette in the Round
- Faster than flat stockinette due to no purling
- Creates a seamless, continuous fabric
- Ideal for tubes, hats, sleeves, and sweaters
- Reduces finishing work (no side seams)
- Provides a uniform and clean look
Tools and Materials You’ll Need
Before you start knitting in the round, make sure you have the right tools and yarn for your project. The following materials are commonly used:
- Yarn: Choose a yarn weight that suits your project. Worsted, DK, and fingering weight yarns are all good choices.
- Circular needles: Select a circular needle with a cord length appropriate for your project circumference.
- Double-pointed needles (DPNs): These are useful for smaller circumferences like sleeves or socks.
- Stitch markers: Mark the beginning of your round to keep your place.
- Scissors and yarn needle: For finishing and weaving in ends.
Basic Steps to Knit Stockinette in the Round
Step 1: Cast On
Begin by casting on the required number of stitches using your preferred method. Make sure your stitches are not twisted on the needle before joining in the round.
Step 2: Join in the Round
Slide your stitches to the left-hand needle, place a stitch marker to indicate the beginning of the round, and begin knitting. Pull the yarn tightly across the join to avoid a gap.
Step 3: Knit Every Round
Continue knitting each stitch in every round. This repetitive action will create the familiar stockinette texture on the outside of your work.
Step 4: Check Your Work
Pause occasionally to check for mistakes or twisted stitches. You should see smooth V-shaped stitches on the outside and bumps on the inside.
Step 5: Bind Off
Once your project reaches the desired length, bind off loosely to maintain flexibility. Finish by weaving in any yarn ends using a tapestry needle.
Common Challenges and How to Avoid Them
Even though knitting stockinette in the round is relatively simple, there are a few common mistakes to watch out for:
- Twisted stitches when joining: Always double-check that your cast-on edge isn’t twisted before you join the round.
- Ladders: These can occur at the transition points between DPNs or between needle cables. Keep your tension even and try shifting your stitches every few rounds to avoid lines.
- Incorrect stitch count: Use stitch markers or count your stitches regularly to stay on track.
When to Use Stockinette in the Round
Stockinette in the round is perfect for a wide range of projects. It’s especially useful when you want a smooth texture and minimal seaming. Consider using it for:
- Hats and beanies
- Socks and legwarmers
- Tubular scarves and cowls
- Seamless sweaters and cardigans
- Baby clothes and accessories
Its simplicity and elegance make stockinette in the round a staple in many knitting patterns and designs.
Tips for a Successful Project
Even simple patterns benefit from careful attention. Here are a few tips to help ensure success with your next circular stockinette project:
- Use a lifeline if you’re knitting a large item you’ll thank yourself later if you need to rip back.
- Block your work when finished to help it lay flat and enhance the stitch definition.
- Experiment with needle materials some knitters prefer metal for speed, others prefer wood for grip.
- Keep your tension consistent throughout to prevent bulging or uneven stitches.
Variations and Enhancements
Once you’ve mastered basic stockinette in the round, you can easily build upon it with additional techniques and stitch patterns. Here are a few ways to add interest to your circular projects:
- Stripes: Alternate yarn colors to add visual texture.
- Increases and decreases: Shape your fabric for fitted garments or decorative contours.
- Eyelets or lace patterns: Integrate yarn overs and decreases for openwork designs.
- Colorwork: Use stranded or mosaic knitting techniques on a stockinette base.
Knitting in the round with stockinette stitch is a core technique that every knitter can benefit from learning. Its straightforward method knitting every round produces a smooth, professional-looking fabric with minimal effort. Perfect for seamless garments and accessories, stockinette in the round is efficient, elegant, and endlessly adaptable. By mastering this technique, you open the door to a world of circular knitting projects, from simple hats to intricate sweaters. With just a bit of practice and the right tools, you’ll find yourself returning to this stitch again and again for its beauty and simplicity.