Among the many knitting techniques used by crafters, the stockinette stitch stands out as one of the most recognizable and versatile. It is widely used in both beginner and advanced knitting patterns, offering a smooth, classic texture that is ideal for a wide range of projects. Whether you’re creating scarves, sweaters, blankets, or decorative items, the stockinette stitch provides a clean and polished look. Understanding how it works, when to use it, and how to troubleshoot common problems can greatly improve your knitting skills and confidence with needles and yarn.
Understanding the Stockinette Stitch
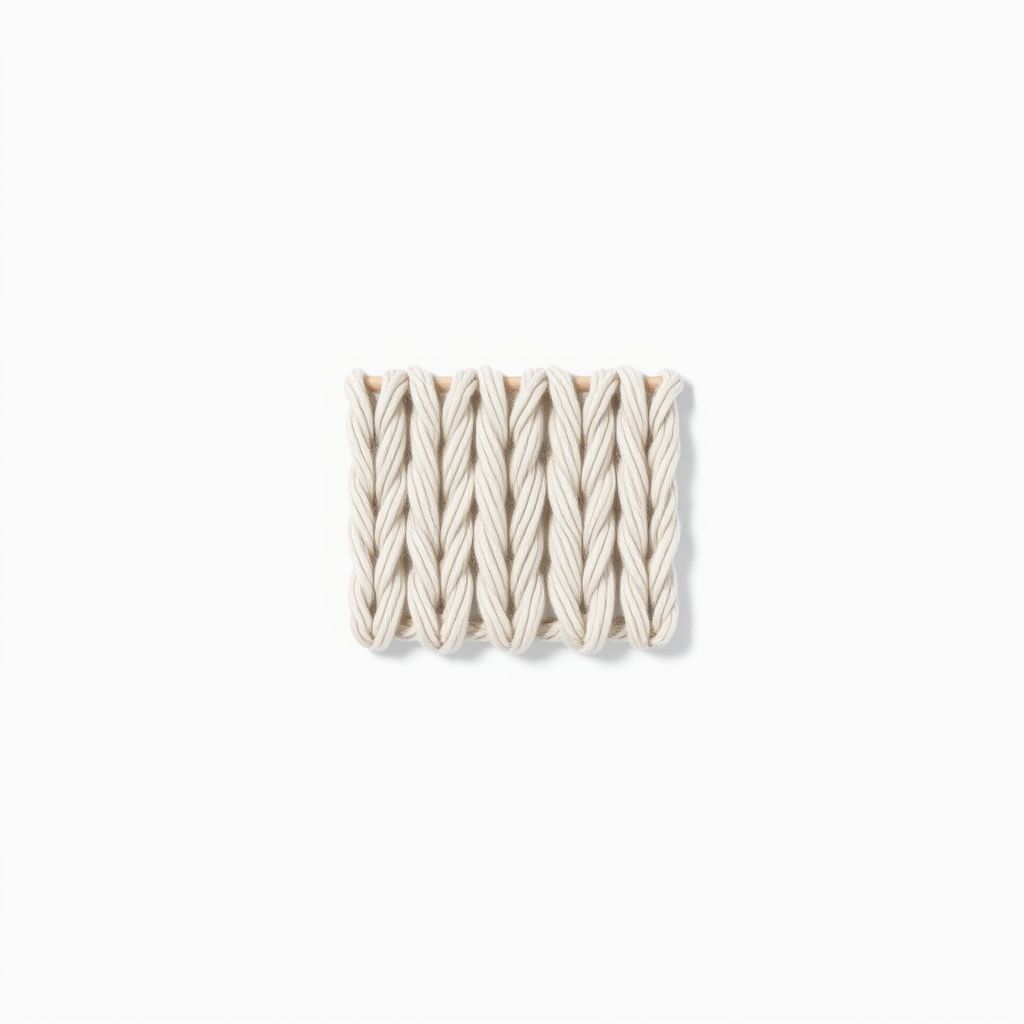
Basic Definition
The stockinette stitch, also known as stocking stitch in some regions, is a common knitting pattern created by alternating rows of knit and purl stitches. Specifically, in flat knitting, you knit all stitches on the right side (the front) and purl all stitches on the wrong side (the back). This creates a fabric with a smooth, V-shaped pattern on the front and a bumpy texture on the reverse.
Visual Characteristics
One of the most identifiable features of the stockinette stitch is its smooth and uniform appearance. The front side of the fabric, often called the ‘right side,’ displays rows of tiny V shapes, which gives it a refined, professional finish. The back side, or ‘wrong side,’ shows a bumpy texture due to the purl stitches. This dual nature makes it easy to distinguish and orient your work correctly while knitting.
How to Knit the Stockinette Stitch
Materials Needed
- Yarn of your choice
- Knitting needles appropriate for your yarn
- Scissors
- Tapestry needle (for weaving in ends)
Step-by-Step Instructions
Here is how you can knit a basic stockinette stitch in flat knitting:
- Cast on the desired number of stitches.
- Row 1 (Right Side): Knit all stitches.
- Row 2 (Wrong Side): Purl all stitches.
- Repeat Rows 1 and 2 until your fabric reaches the desired length.
If you are working in the round using circular or double-pointed needles, you only need to knit every stitch on every round to produce the same stockinette texture.
Common Uses for Stockinette Stitch
Apparel and Accessories
Stockinette stitch is frequently used in wearable items such as:
- Sweaters
- Scarves
- Hats
- Gloves and mittens
Its smooth surface provides a great base for additional embellishments like embroidery or appliqué. The simplicity of the stitch also makes it perfect for showcasing fancy or textured yarns.
Home Decor Projects
This stitch is also favored for home items like cushion covers, throws, and even wall hangings. Because of its even texture, stockinette stitch can be combined with other techniques like colorwork, cables, or lace panels to add visual interest.
Advantages of Using Stockinette Stitch
Beginner-Friendly
One of the biggest advantages of stockinette stitch is how easy it is to learn and master. Since it only requires basic knit and purl stitches, it is an excellent pattern for beginners looking to get comfortable with the fundamentals of knitting.
Fast Progress
Due to its repetitive nature, stockinette stitch allows for fast progress on larger projects. Once your hands get used to the rhythm, it becomes a relaxing and almost meditative task.
Versatility
The pattern can easily be adapted into more complex designs by integrating borders, textures, or color changes. It’s also compatible with other stitch patterns, making it a flexible choice in both garments and decorative knitting.
Challenges with Stockinette Stitch
Edge Curling
One of the most common problems knitters face with stockinette stitch is that the edges tend to curl inward. This curling is due to the tension difference between knit and purl stitches and is a natural behavior of the fabric.
Solutions for Curling
- Use a border of garter stitch or ribbing to stabilize the edges.
- Block the finished piece using steam or water to relax the fibers.
- Use heavier yarn or double-stranding to reduce curl.
Stretching and Rolling
Stockinette stitch can also stretch over time, especially in garments. This may cause the item to lose shape or lengthen more than intended. Choosing the right yarn with appropriate elasticity and making swatches before starting a project can help prevent this issue.
Variations of Stockinette Stitch
Reverse Stockinette Stitch
In this variation, the purl side of the fabric is used as the right side. It has a more textured appearance and is often used to create contrast panels in garments or accessories.
Broken Stockinette
By mixing in rows of garter or seed stitch, knitters can break up the smoothness of the fabric and add texture. This variation is particularly useful for items that need a more structured feel or reduced curl.
Colorwork and Patterned Variations
Stockinette stitch is an excellent background for advanced techniques like intarsia, stranded colorwork, or duplicate stitch. These patterns stand out clearly on the smooth surface of the stockinette background.
Tips for Working with Stockinette Stitch
- Always count your rows carefully to avoid uneven lengths, especially in garments.
- Use stitch markers when working on large projects to keep track of sections.
- Experiment with different yarn weights and needle sizes to see how the fabric drapes or stretches.
- Practice good tension to ensure your stitches stay even throughout the piece.
The stockinette stitch remains a favorite among knitters of all levels due to its simplicity, versatility, and classic appearance. While it may come with a few challenges like edge curling, these can be easily managed with simple techniques and modifications. As you continue to explore knitting, mastering stockinette stitch opens the door to countless creative projects from stylish garments to cozy home accessories. Whether you’re a beginner learning the basics or an experienced crafter looking for a dependable go-to pattern, the stockinette stitch is a fundamental building block of beautiful, functional knitting.